• Facebook
  • Instagram
  • Pinterest
  • Twitter
  • YouTube
  • Skip to primary navigation
  • Skip to main content
  • Skip to footer

Painted Furniture, Makeovers and Upcycle Projects, DIY Home Decor and Crafts, and Recipes

  • About
  • Creative Inspiration
    • Furniture Makeovers
    • Thrift Store Makeovers
    • Tips & Ideas
    • Home Decor
    • Spring & Summer
      • Valentines
      • Easter
      • Other Holidays & Fun
    • Fall & Winter
      • Christmas
      • Thanksgiving
      • Costumes & Halloween
    • Creative Kids
      • Crafts
    • Party Ideas
    • Free Printables
  • Recipes
    • Breakfast
    • Dinner
    • Sides
    • Crock Pot & Soups
    • Desserts
    • Beverages
  • Shop
    • Etsy
    • Amazon
  • Privacy Policy
    • PR/Disclosure

Play-doh Lids Become Mini Magnet Masterpieces {Fun for Kids}

August 9, 2012 by Molly


Last week I shared this project over at Mom4Real, and wanted to bring it here to you today.
I don’t know about you, but when my kids play with play-doh, it never fails that it eventually ends up dried out. When that’s happened, I’ve saved the colorful lids thinking “I bet I can do something with those”. 

That’s the motto of every crafter anyway, right?


Over time, I’ve also accumulated many art projects from my little budding artists. As beautiful as children’s art is, it’s not very practical to hang every piece around the house.

My solution? Combine the two!
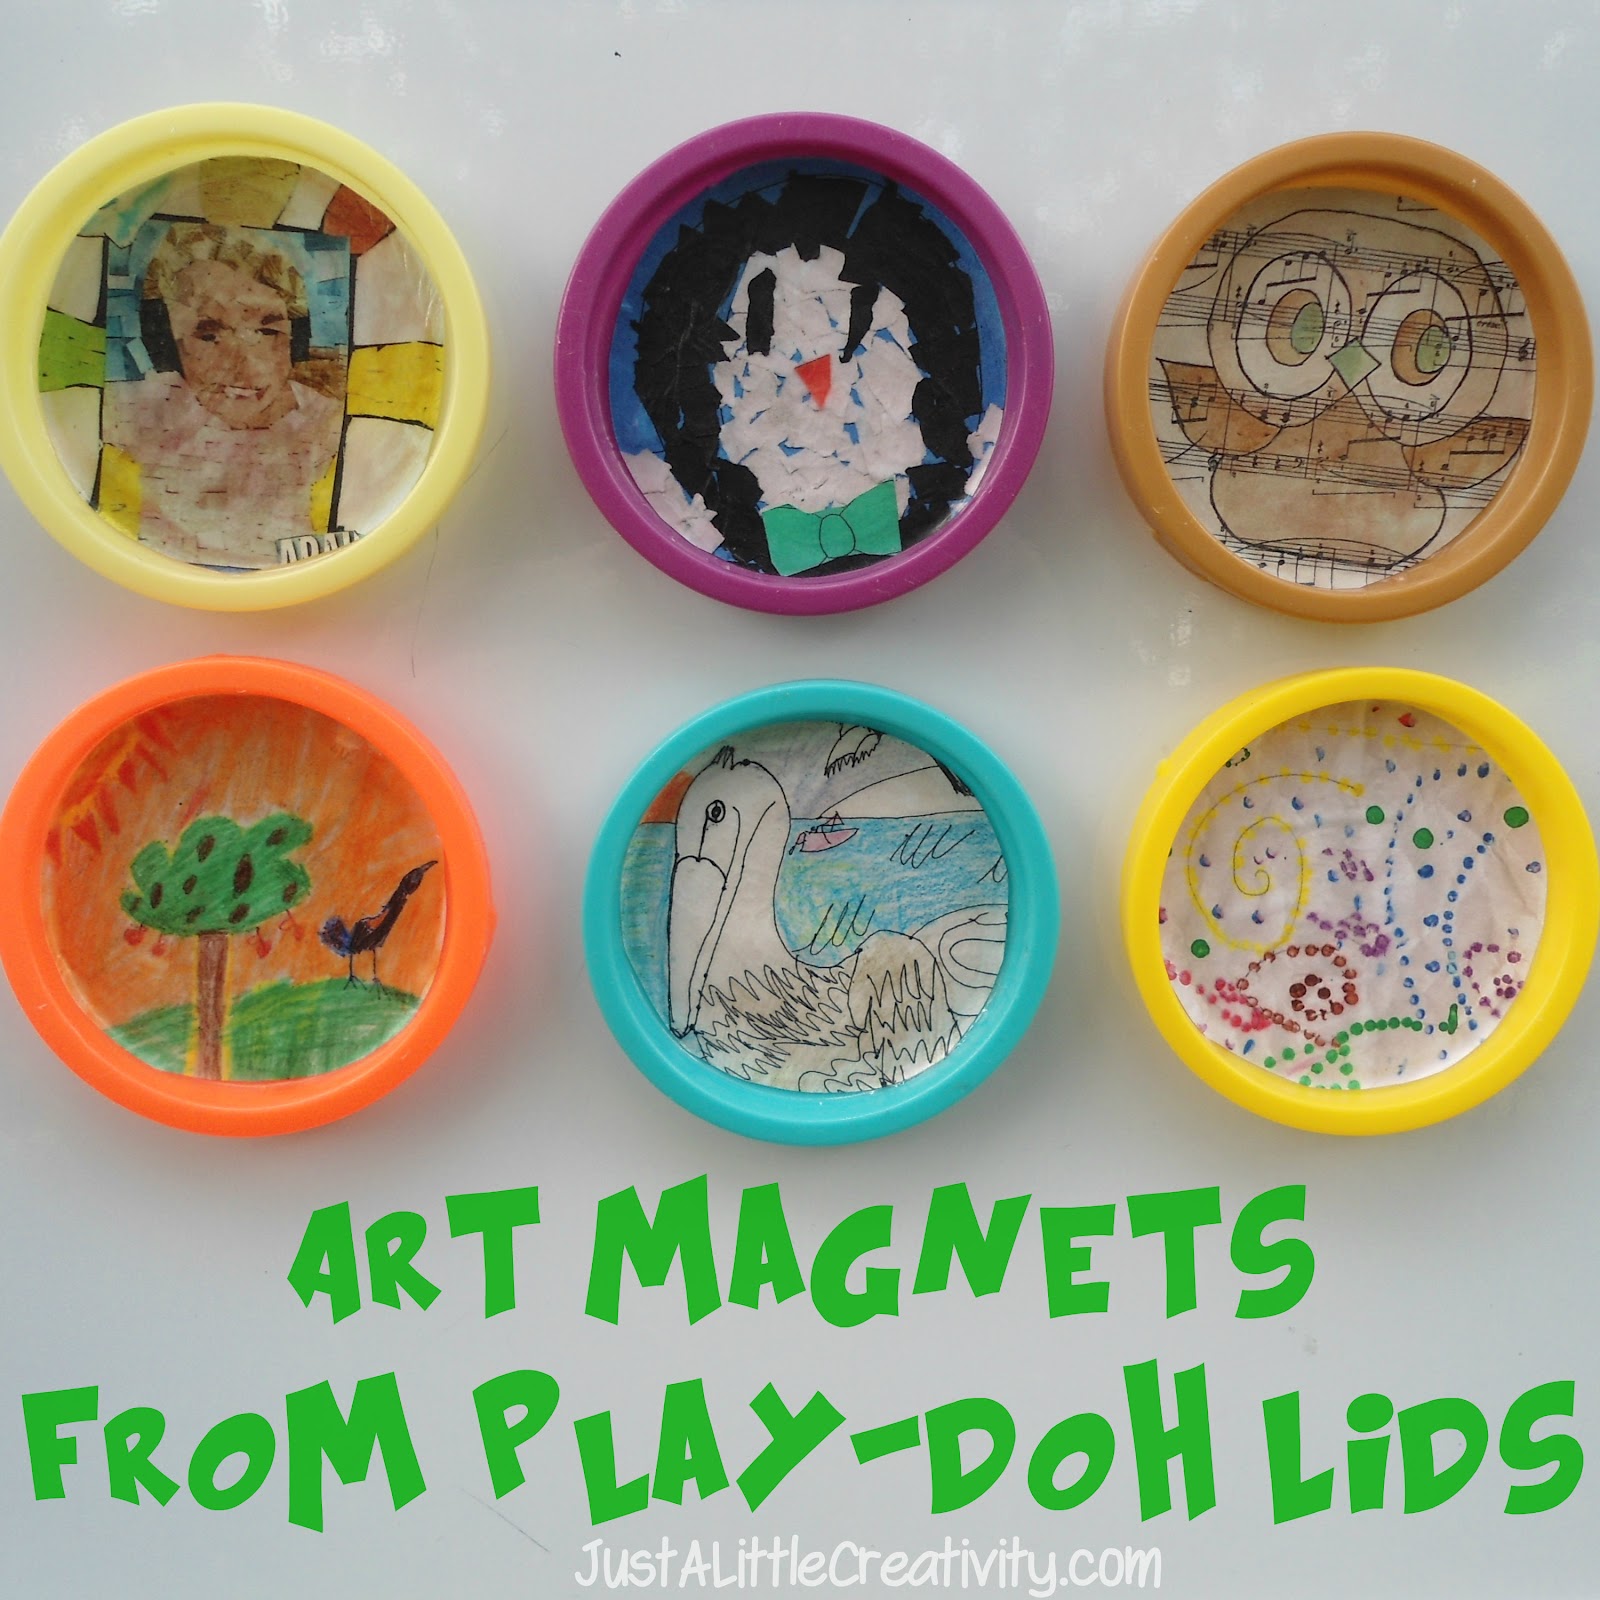
With a regular home scanner and printer, some Mod Podge, and craft magnets, you can have a fridge full of these mini masterpieces!

I began by letting the kids chose a few of their favorite art projects, then I scanned each piece, and printed it in wallet size. I printed mine on regular paper, but card stock would work as well.


Once your art is printed, the steps are very easy-

1. Trace around the lid
2. Cut the image to size, keeping in mind that you’re inserting the image into the lid, so you’ll be cutting it a bit smaller than the circle you traced.
3. Brush Mod Podge into the lid and insert the printed image 
4. Once that’s dry (about 20-30 min) add a layer of Mod Podge on top of the image. You can do a few layers of Mod Podge if you’d like. 


    5. Once dry, add magnets to the back. Here, I’ll tell you I tried lots of different glues and a few different magnets before I found something that would stick to the smooth plastic surface of the lids. I found that a strong super glue on craft magnets that have a sticky padding on them is best. I found mine at Office Depot. I also found that if you take a piece of sandpaper and rough up the surface just a bit, it sticks even better. I still suggest being gentle with them, if they get dropped on the floor too many times, the magnet could still come off.


    That’s it, you’re finished!

    See, I told you it was easy. Now, you can display your child’s precious artwork without it overtaking your entire home.

    This project has been Featured!
    A Crafty Soiree


    Crafty Confessions

    Pin It


    Like what you’ve seen? Follow along

    Share this:

    • Share on X (Opens in new window) X
    • Share on Facebook (Opens in new window) Facebook
    • Share on Pinterest (Opens in new window) Pinterest

    Related

    Filed Under: Crafts, Creative Kids

    Previous Post: « Breezer Playhouses {Giveaway Winner Announced}
    Next Post: Win a Year’s Worth of YumEarth Organic Candy! {Giveaway Winner Announced} »

    Reader Interactions

    Comments

    1. jennifer zuna says

      August 9, 2012 at 5:30 pm

      SOOO neat!!

    2. Rachel @ The Philosophers Wife says

      August 9, 2012 at 5:54 pm

      Oh this is so much fun! I love it! And what a great idea for when the PD has dried out.

      If you're interested, I'd love for you to share at my Teaching Time Linky.

      http://philwife.blogspot.com/2012/08/teaching-time-for-toddlers-elephants.html

    3. Natalie Dixon says

      August 9, 2012 at 10:32 pm

      Love this! So clever! I'm going to share this on my FB wall for The Thrifty Turtle!

    4. LOVE MELISSA:) says

      August 10, 2012 at 2:50 am

      I love these so much! How unbelievably creative!!! So fun!

    5. ReviewsSheROTE Pamela R says

      August 10, 2012 at 12:50 pm

      so neat had to pin it!! What a super way to have many art pieces at one with out using a whole wall!!!
      Us crafty creaturse created "green art" before it was a THING- WASTES NOTHING!! LOL

    6. Isabella_Grey says

      August 11, 2012 at 2:02 am

      This is such a cute idea!

    7. Britni says

      August 11, 2012 at 3:04 am

      This is too cute! I tried to stare at the picture and guess what those were before I read it, but had to cheat and read it anyway cause I couldn't figure it out 🙂 Love it. I would love if you shared this at my Throwback Thursday party. I hope to see you there! 🙂 http://www.hubbymademe.com/throwback-thursday-no-5/

    8. Holly (Woman Tribune) says

      August 12, 2012 at 1:55 am

      This is such a great idea! I actually have about 10 empty Play-Doh containers laying around the house right now, and am totally going to do these with my stepdaughters. They would also make great ornaments for the Christmas tree!

    9. Emilee Roberts says

      August 12, 2012 at 3:14 am

      What a GREAT idea! I will definitely have to "pin" this one, so when our Play-Doh dries out again we can make use of the lids this way! Thanks for sharing!

    10. Katie's Nesting Spot says

      August 16, 2012 at 1:58 am

      What a great idea, I love how the tops provide a colorful frame for the artwork and that since they are plastic they can be handled over and over. Great green project that wastes nothing. Thank you for sharing at A Crafty Soiree! I've featured your post in the newest one. It will be up at midnight EST tonight, please come by and check it out when you can!

    11. Hani Shabbir says

      August 16, 2012 at 3:36 pm

      what a fun project. Love the idea of making magnets using these. Thanks for linking up!

    12. The Mandatory Mooch says

      August 17, 2012 at 4:50 am

      This is too cute!! I would love for you to link up to Tasty Thursdays at The Mandatory Mooch. http://www.mandatorymooch.blogspot.com/2012/08/tasty-thursday-4.html

      Thanks, Nichi

    13. Megan @ PolishTheStars.com says

      August 22, 2012 at 5:25 pm

      These combine two of my favorite things: colorful decor projects and re-purposing "trash". Love it!

      – Megan from polishthestars.com

    14. Heidi Fowler says

      August 23, 2012 at 1:16 am

      I just threw away some playdough! Now I'll definitely have to dig through my garbage. My kids would love this idea! I hope you'll link up this weekend at OneCreativeMommy.com. (I'm a new follower on google and facebook.)

    15. Confessions of a Stay at Home Mommy says

      August 26, 2012 at 2:13 pm

      Thanks for linking up to last week's Tuesday Confessional link party! Your post has been featured so head on over and grab a brag button!
      http://www.craftyconfessions.com/2012/08/tuesday-confessional-features_26.html
      ~Macy

    Footer

    © Just A Little Creativity, 2010-2025

    If you’d like to feature one of my projects or posts, one photo may be used, provided that full and clear credit is given to Just A Little Creativity with appropriate and specific follow direction to the original content.
    Unauthorized use and/or duplication of this material without express and written permission from this blog’s author and/or owner is strictly prohibited.

    Just a Little Creativity is a participant in the Amazon Services LLC Associates Program, an affiliate advertising program designed to provide a means for sites to earn advertising fees by advertising and linking to Amazon.com


    Copyright © 2026 · Foodie Pro Theme by Shay Bocks · Built on the Genesis Framework · Powered by WordPress