
Recently, I’ve had a bit of window shopping envy over all the mercury glass that decor that’s currently in all the high end stores, because it’s definitely out of my budget.
Plus, you know me, it looks like something I even think I could do myself, I’m going to try it first. And nine times out of ten, I’ll be able to do it at a fraction of the cost.
When I received this huge package of Martha Stewart Crafts supplies a few weeks ago, it was like Christmas Day for the crafter in me!
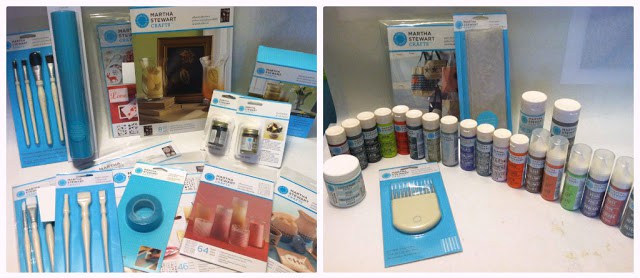
I was immediately drawn to the silver liquid gilding. I knew exactly what I would use it for creating my own mercury glass pumpkins that are ever so popular this Fall.

Plus, pumpkins are the perfect decor item, because they can last through the Halloween season straight into Thanksgiving.
I found these pumpkins at the dollar store. I snatched up quite a few of them for various project ideas, and I’m sure the cashier was curious, but she tactfully didn’t ask why I had so many.
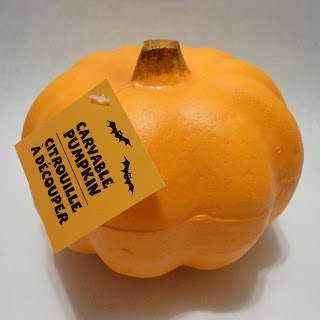
Before using the gilding, I gave them a coat of white primer. Just for good measure because they’re a porous surface, I let it dry overnight.
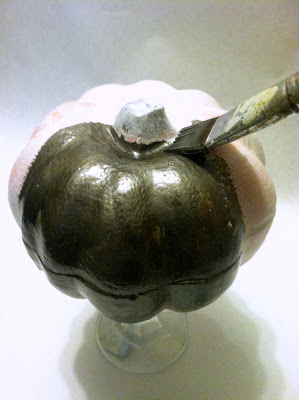
The next day, I used one of my older flat paint brushes, and simply followed the gilding instructions, painting it onto the pumpkin. I’ve never used gilding before, because I thought it might be difficult to get a nice even coat, but this worked amazingly well!<
Only one coat gave the pumpkins an even, shiny look. One noteworthy tip, be sure that you have paint thinner on hand to clean the gilding off of your brush, or else it will be ruined.
Now, for the mercury glass effect, which is actually very easy to achieve.
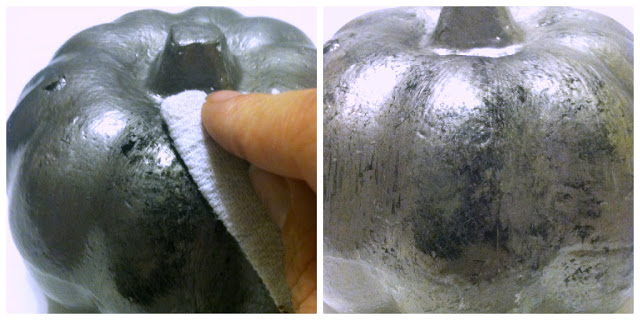
I simply dampened an old washcloth, and dipped a corner into regular black craft paint, then dabbed it onto the pumpkin, working a small section at a time.

By using a second dry washcloth, and a series of dabbing and rubbing off the paint, so that only a bit is left on the surface of the pumpkin, you now have the illusion of the highlights and shadows, as well as the texture of the mercury glass.
Because the gilding doesn’t absorb the craft paint very quickly, it gives you a little time to get the exact depth and textured look you want.
I think it also helped that my pumpkin had a bit if texture to it already, with lots of little dents and nooks and crannys for the black paint get into.
As you can see, the transformation is amazing!

Once I let the pumpkins dry for about an hour, I was able to use them in my decor.
I turned a few glass candle holders (also from the dollar store) upside down so that the wider base is on the top for stands for the pumpkins.


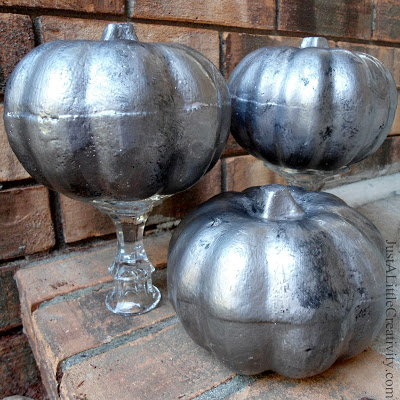

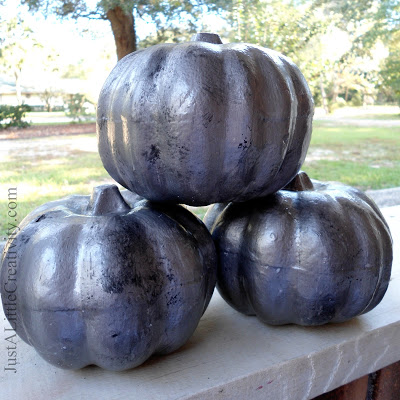
For a tiny percentage of the cost to purchase three mercury glass pumpkins, I was able to create and enjoy my own.
And now, you can too, enjoy!
I received product and payment via The Blueprint Social for this post, however, as always, my opinions are 100% my own. My Amazon affiliate links have also been used, thanks!
Very cool and great info about the paint thinner! I did ruin two brushes trying out the liquid gilding but didn't realize it til the next day when they were rock hard! I'll add paint thinner to my craft list. 🙂
AWESOME job on this tutorial and the finished product. I have not done/used gilding before…so I am going to learn more about it, because if you can transform a Styrofoam dollar store pumkin into something that glamorous and exquisite, who knows what I can do if I out my mind to it! THANKS.
Very cute! I am in love with Martha Steward paint and those Dollar STore pumpkins!! Love it all! I am following you now. My blog is http://www.thecsiproject.com
I am a huge fan of pumpkin decor for exactly the reason you mentioned–they can be kept out straight through Thanksgiving. Those pumpkins you created came out so great. I cannot believe you created that from dollar store pumpkins. Amazing!
That is so cute! I love Martha Steward and her paint is awesome. I pinned this!
Wow, this is such a great idea. I really love the mercury glass look. I think I may just try this.
Thanks for sharing.
I saw those pumpkins at the dollar store too, and thought they'd be perfect for some kind of project. Yours turned out great!
Hello! I'm visiting from Thursday Favorite Things. This is a really cool idea! I love how it makes the pumpkins look spooky. Great job!
Love those pumpkins!!! They turned out great!
Thanks for sharing your project!
Maki
Maki's Little Red House.blogspot.com
I suddenly feel an urge to go to Michael's today! I love these.
Erinn of http://www.3sonshavei.com/
Wow, love this project. Thank you for sharing at the Thursday Favorite Things blog hop. Wishing you a beautiful weekend xo
Beautiful!
Ok…. where have I been? Carvable pumpkins that you can keep from year to year!! Hello frugal creativity! Thanks bunches 🙂
Those are gorgeous!!!!
These are beautiful. You did a great job. I have a link party called Wednesdays Adorned From Above Link Party and would love to have you share this with everyone. Here is the link to the party.
http://www.adornedfromabove.com/2012/11/wednesday-adorned-from-above-link-party.html
Debi @ Adorned From Above
Hi, your pumpkins came out looking so pretty. You did a great job decorating them. I saw it on wow me wed.
Julie from julieslifestyle.blogspot.com
I agree, this is an amazing transformation, what a great supply you have to pick from, can't wait to see what else you've come up with!
I linked over from the Homemade by You Party where I am participating with my
Cute Halloween project,
If the Broom Fits Free Printable,
Every Leaf Free Printable
I would love it if you'd stop by.
Hugs, antonella 🙂
These are so pretty and you make the mercury glass painting look so easy that I want to try it now.
i'm totally having craft envy over all those supplies! how exciting! and the pumpkins turned out super cute! http://www.handmadeintheheartland.com/
Definitely more beautiful after!!
I love that this is simple, too – achievable for those of us without expert-level craft skills. 🙂
You did a great job. Love it. I will be featuring this tonight at my Fall into Fall party that opens at 8pm EST. Please stop by and pick up an I've Been Featured button. Thanks. http://diybydesign.blogspot.com
They are beautiful! Thank you for sharing at The Really Crafty Link Party. Pinned!
I love redoing these $1 pumpkins! Your pumpkins came out great. 🙂
Thanks for sharing with us at #MMBH!
I absolutely love the look of mercury glass. These turned out super adorable, I may just have to give this a go! Thank you so much for sharing with us at Dishing It & Digging It!
Awesome idea!! I love the mercury glass look too and have made a few pieces myself, but always on glass using mirror spray. I never would have thought to use gilding until I saw your post! Thanks so much for sharing at Friday Favorites! Your project will be featured at our next party! Have a great one – Christine at Light and Savvy
What a super cute idea!! They came out beautiful!! Thanks for sharing on My 2 favorite Things on Thursday. My blog was down last week but it’s up and running again. I hope you can find time to stop by and share some more this week! Pinned!