A few Christmases ago, my parents gave my son this art easel. It had a chalkboard on one side, and a dry erase marker on the other. It was quite cute at the time, but as the years have gone by, it had fallen into a bit of disrepair, and eventually landed itself in storage. The chalkboard wouldn’t ever look clean, no matter what, and the dry erase side had been written on in sharpie (who gave the kid a sharpie anyway?).

By now, you know how I like to makeover the kids toys that still have a lot of life left in them, so instead of taking it to Goodwill, I decided to give it a new lease on life with a quality makeover, which was (thankfully) quite simple.
Here’s the supplies I used–
Chalkboard paint
Silver Metalic Krylon spray paint
Aqua washi tape
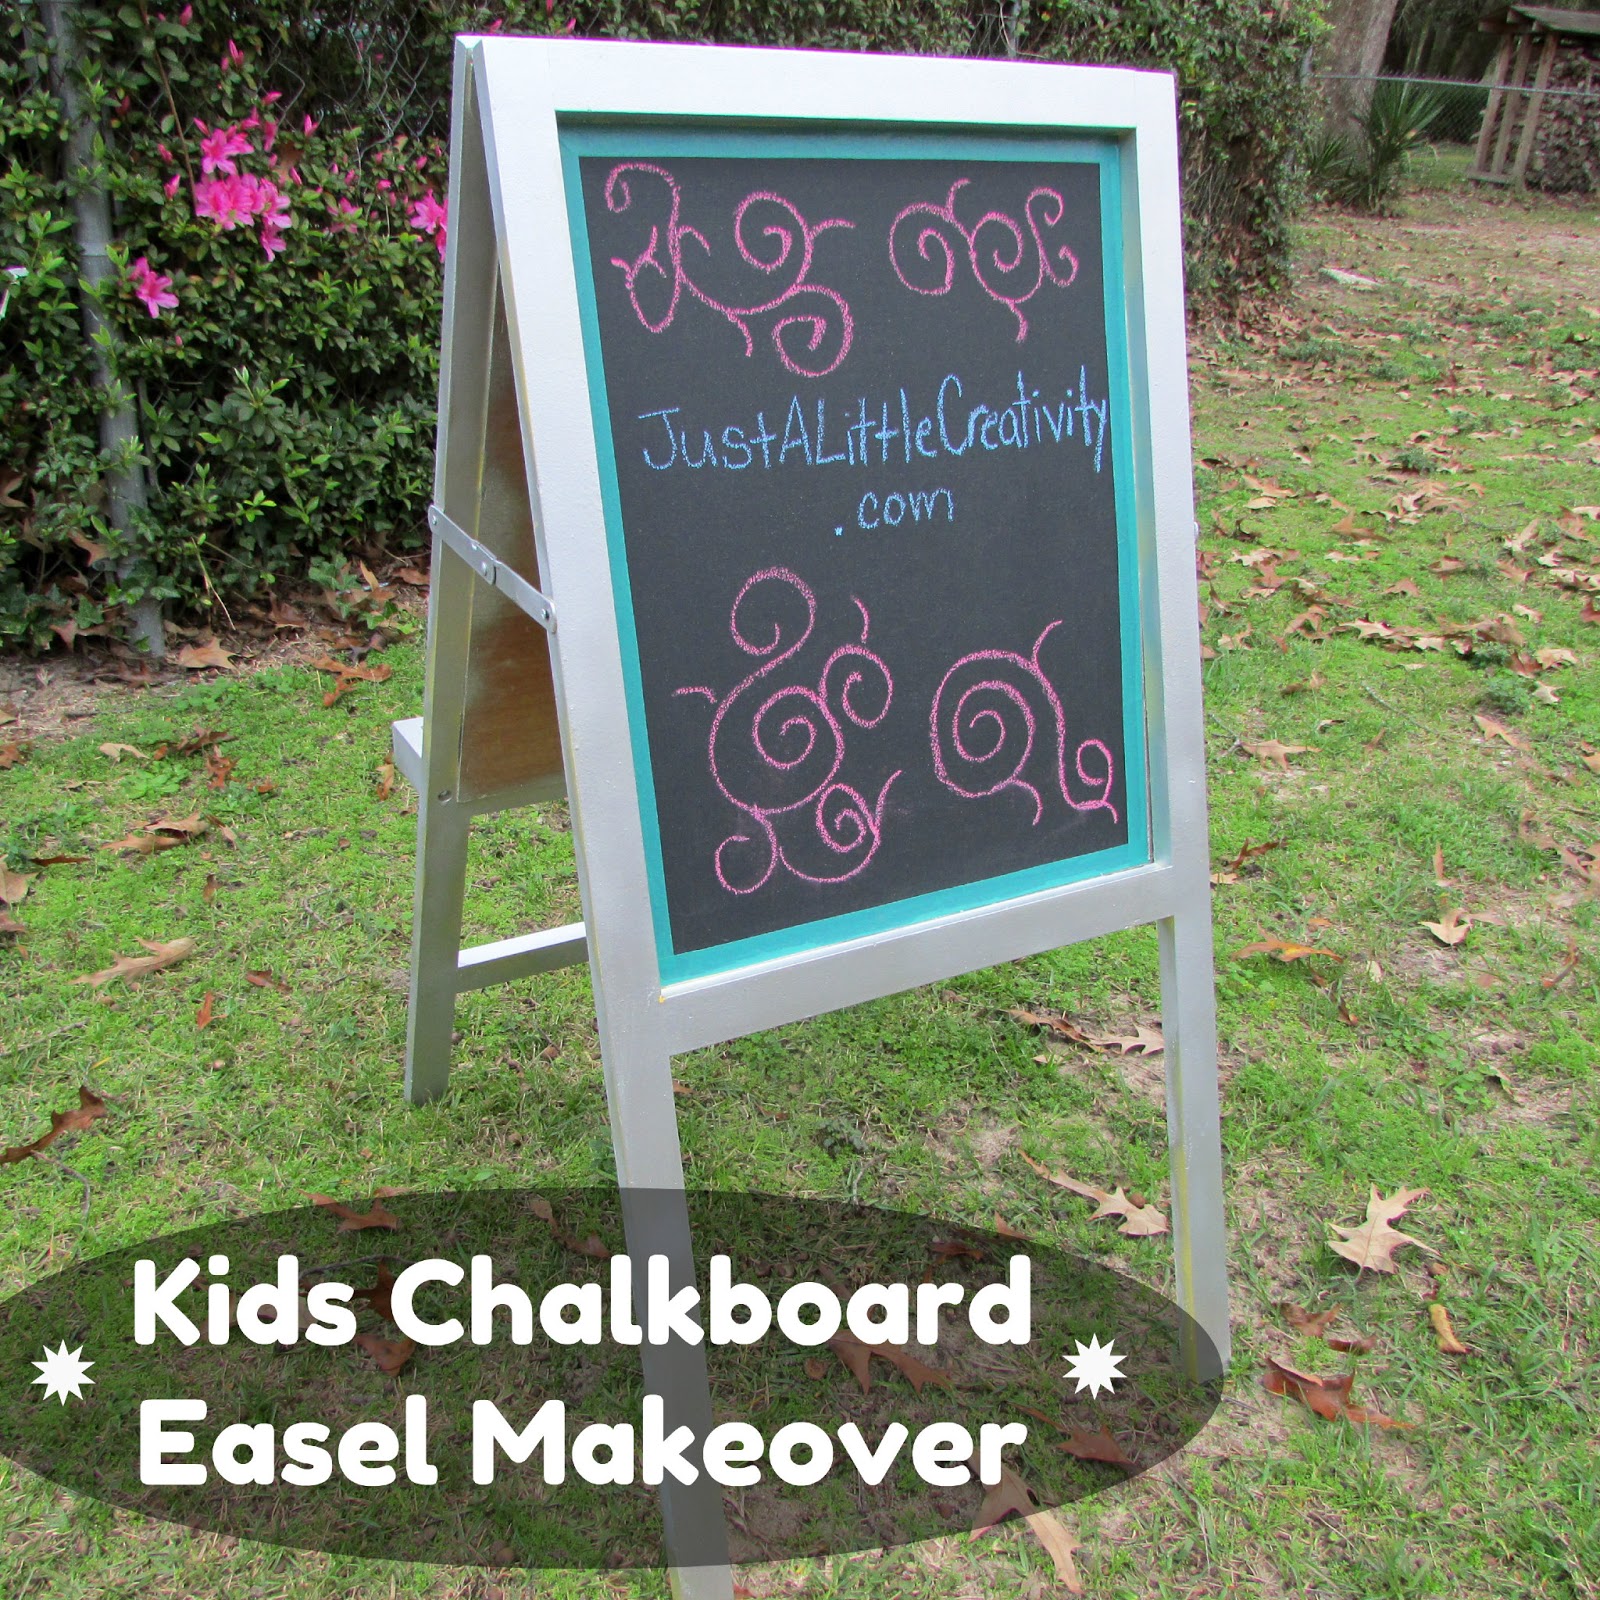
First, I started by painting the chalkboard paint on both sides, and it even went on perfectly over the dry erase board. Then, I got smart and decided instead of trying to tape off the board, I’d just spray paint the frame first with my silver, then go back and do my three coats of chalkboard paint.

Because I wanted to make things even easier on myself, I didn’t even paint all the way to the edges of the frame, because I knew I wanted to outline the board with my washi tape.

Next, once I let the paint dry overnight (and yes, I sanded down that glob of paint in that pic above), like I said, I trimmed the outline of the chalk board in my favorite washi tape color.

That’s it, finished!


One more thing, make sure you condition the chalk paint with chalk (rubbing the chalk
over the entire painted space, then wiping off) for best results. I’m
not sure why this works, but it does.
I’ve seen these at Goodwill and yardsales often, hopefully you will too if you don’t already have one. I think you could do the same thing with a plastic easel by using the Krylon for plastics paint.
Have fun!

Like what you’ve seen? Follow along

I love this idea! We have an similar easel that rarely gets used, but this is a super fun make over. I'm tempted now. Lol. I may have to give this a try.
Molly, I was so happy to see you link up this week. love this project. Thank you for sharing at the hop xo
Thanks! My kids got an IKEA easel for Christmas and we had a friend over to play and the friend wrote in dry erase marker on the chalkboard. So I'm going to paint over it with chalkboard paint at some point. Pinned this for that day.
Great makeover! I love the blue border! Thanks for sharing @ Submarine Sunday!
I love the silver and blue in the makeover.. Thanks for linking up at Friday Fun Party.
I found you from Sugar Bee Crafts! I'm your newest follower via GFC. I host Fluster Creative Muster Party on Wednesdays and I would love it if you would come by and party with us. Hope to see you there!
Hugs, Smiles, and Blessings,
Robin
Fluster Buster