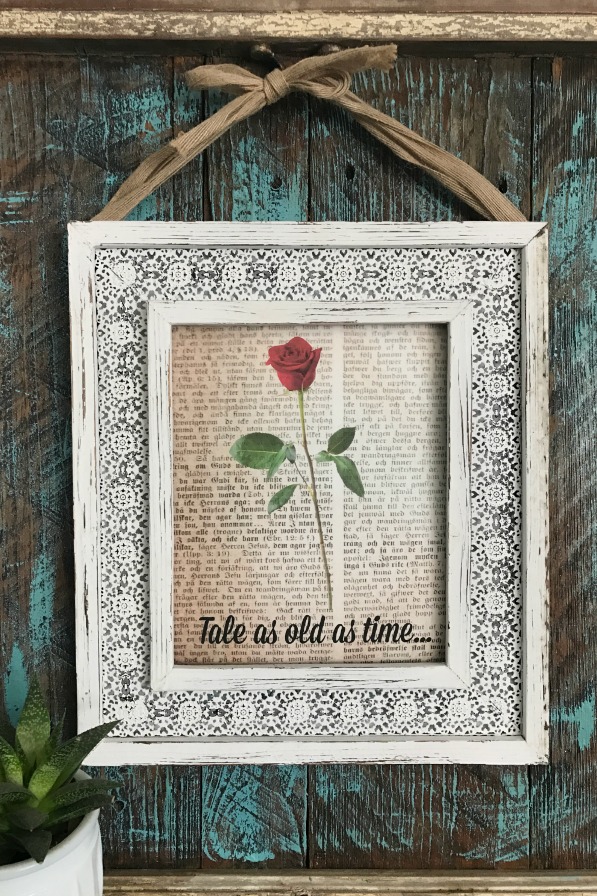
Time again for another Monthly Movie Challenge! This month, our theme is Beauty and The Beast, in anticipation of the new live action movie that releases on March 17. Growing up loving the Disney version, and then seeing my daughter love it as well, to say I’m excited to see this new one is an understatement! I. Can’t. Wait!
If you’ve haven’t had the privilege to see the movie trailer yet, here you go…
And don’t worry, no real books were harmed in the making of this project (Belle would be so upset if they were)!
I found a great website called Furry Graphics that has tons of free digital scrapbooking material. She has an antique book page image that’s free to download, and you can choose an assortment of colors and styles. I chose the frayed yellow paper background for this post.
You simply click and save the image from her page to use it.
I use PicMonkey to easily create all my graphics. If you’ve never used it and need a simple editing program, this is the one I recommend. If you’re a new user, it’s free to try all of the features, and if you love it you can start a free trial in order to save your designs to Hub, create custom effects, and share and export your work. Click HERE for my affiliate link that you can use to get started on that free trial offer.

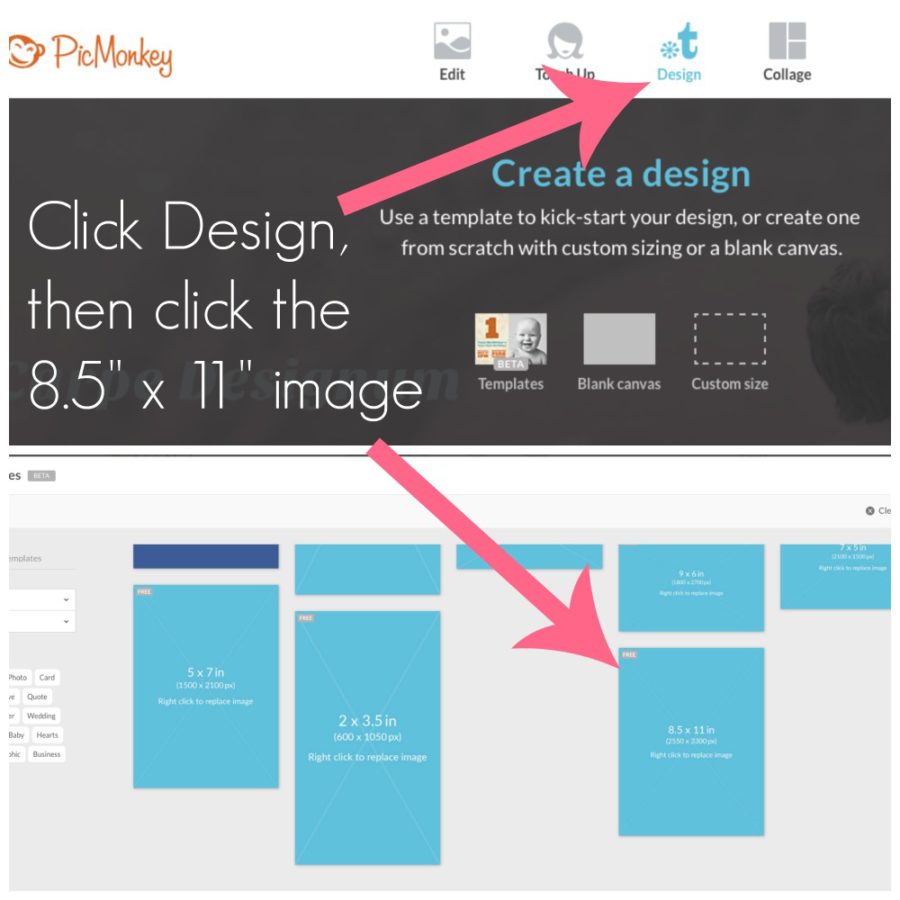
When you first visit PicMonkey, you can choose to edit, touch up, design, or create a collage.
For this project, you’re going to chose Design, and then, scroll down until you see the option to create a 8.5″x 11″ page. Click that.
You’ll see a blank white page when the program opens. This is where you’re going to do all your designing.
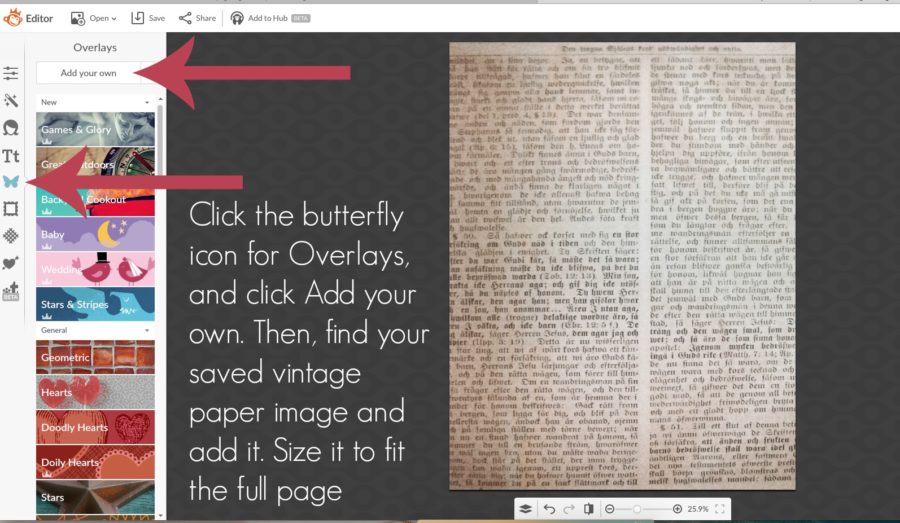
You need to get your antique book page onto the screen. So, on the left, click the butterfly icon, and click Add your own. That’ll open your computer files, so find where you stored your book page image and click it.
That will put it on the page, but maybe not to the exact size you want. Just grab the dot in the bottom of the image, and drag it until the book image fits your page.
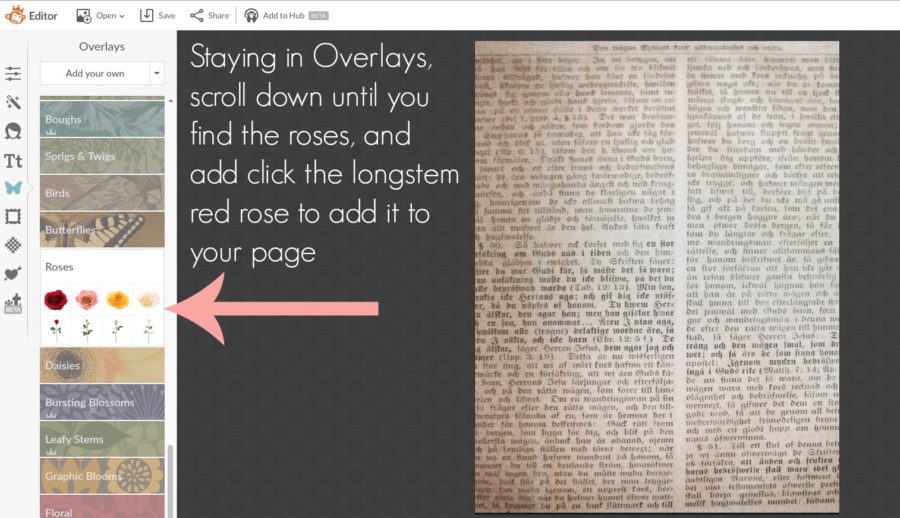
Now, you want to add your rose.
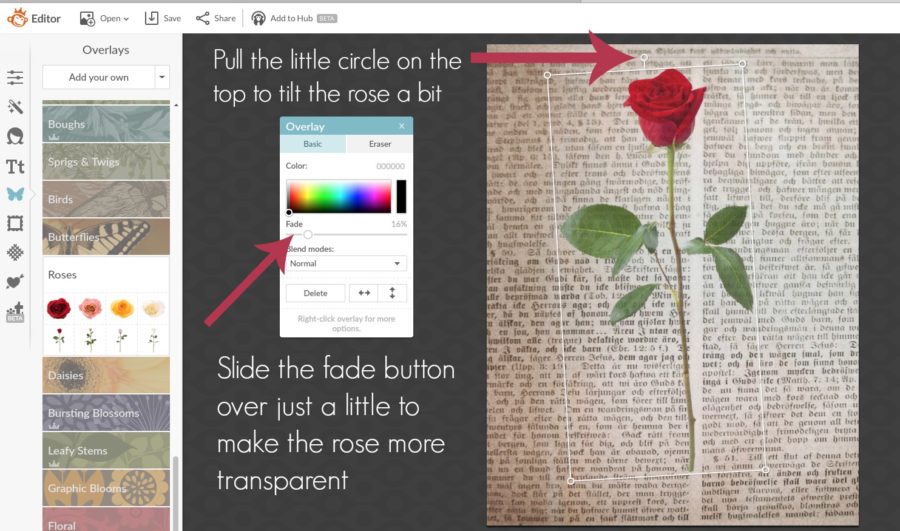
Stay in Overlays, scroll down until you find the roses. These are images that PicMonkey has preloaded into their program that are totally yours to use as you like.
For this project, click the long stem red rose, and it will be added on top of your book page image.
From here, you can size your rose however you’d like by clicking the circles around the image. I made mind just a little bigger, and tilted it a bit by clicking the top middle circle and adjusting it.
You’ll also see where you can adjust the transparency of the rose, which I also chose to do. Just slide the button where it says fade and adjust the transparency of the rose image the way you’d like.
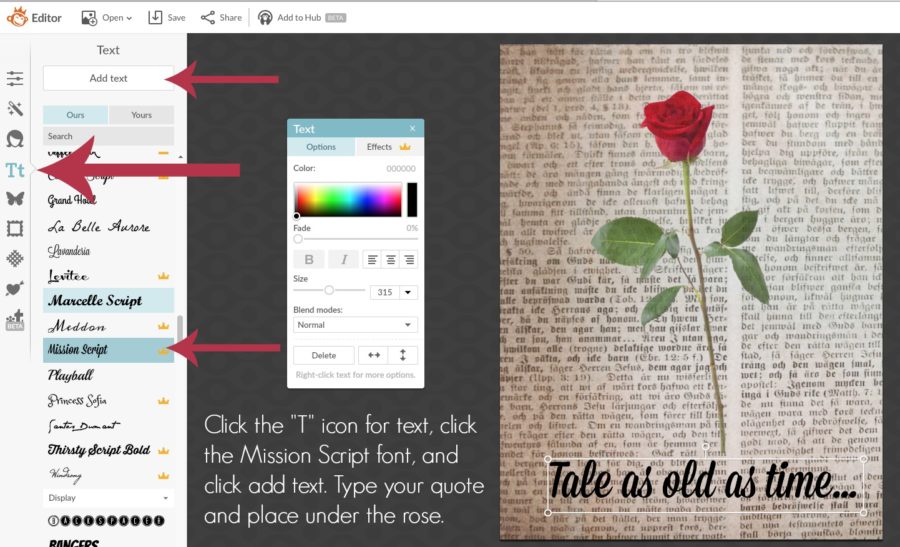
Now, to add the text. Click the “T” icon on the left, and choose your favorite font.
For this project I used Mission Script, which is one of the fonts available on the paid plan.
Click the Add text button, and then resize and position by dragging the box around the text.
When you have everything positioned how you like it, it’s time to save your image.
On my iMac, once my photo is saved, I can print directly from the image.
You’ll need to figure out on your own computer how to print your image, but I’m sure it’s easy.
I do recommend printing it on a sheet of card stock for durability.
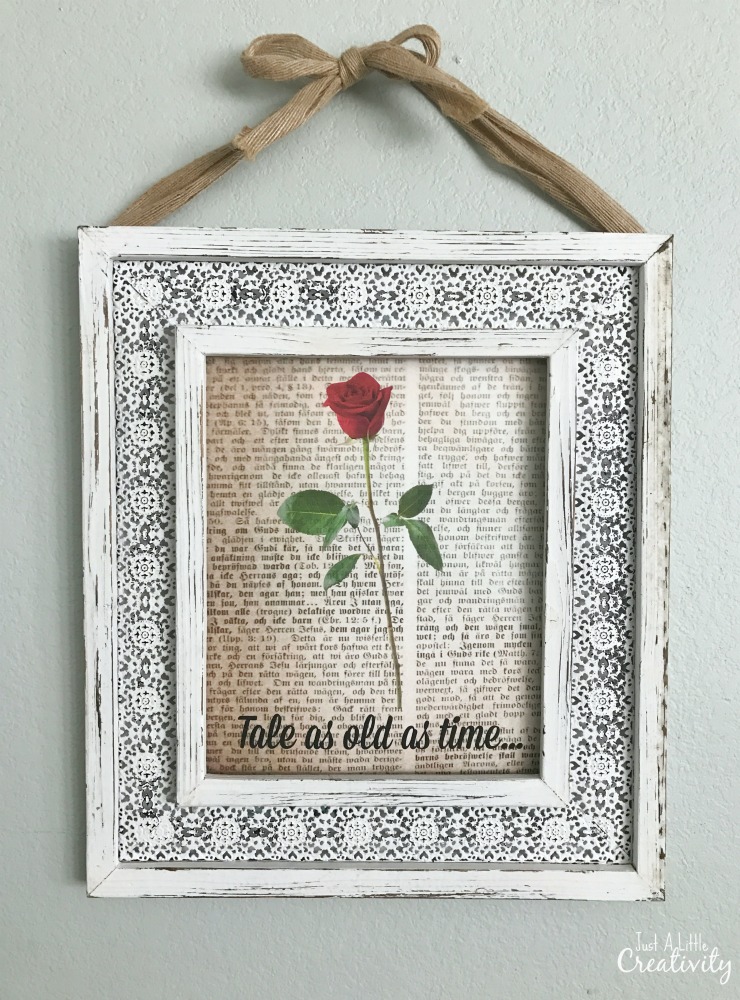
Put your image into a frame, and you’re finished!
Be sure to check out the creative Beauty and The Beast ideas from the other bloggers who participate each month in our Monthly Movie Challenge.
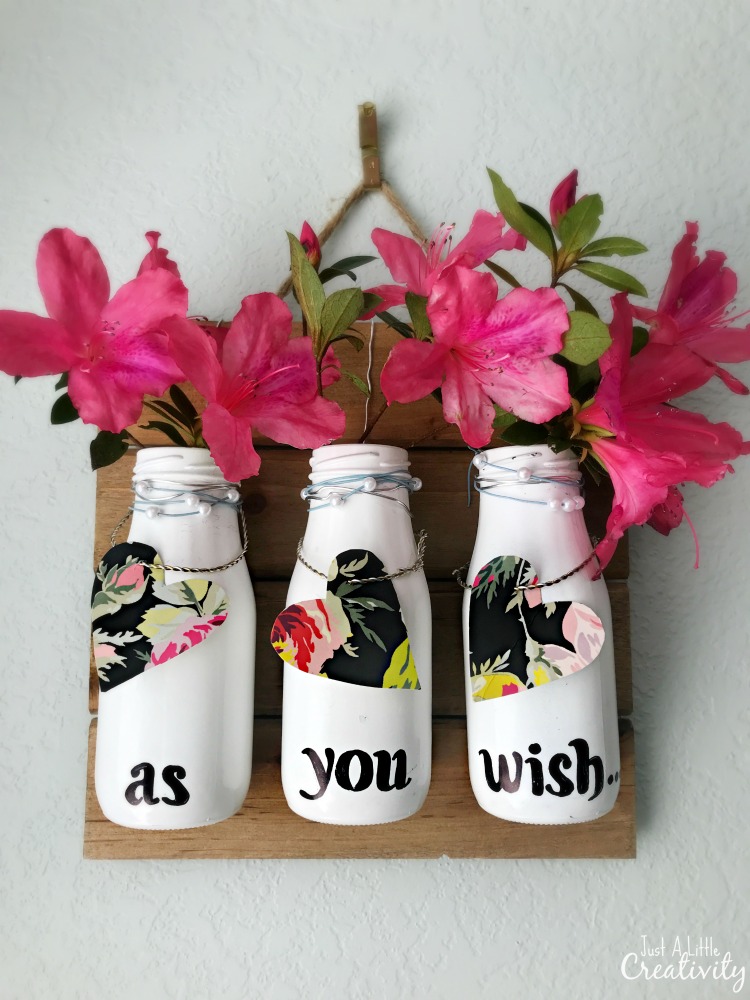
If you like this Movie Challenge project, then make sure you check out our projects for The Princess Bride where I shared my “As you wish” romantic hanging vases tutorial.


I love Picmonkey, and this looks like a fantastic printable! Truly looks like an old book page!
Great project and nice tutorial, I love how it turned out!
I love freebies and the antique book page is so pretty! This is such an easy project that looks really high-end. I’ve been using PicMonkey forever and it’s such a simple editing program. The finished project is beautiful!
Pic monkey is just the best!! This turned out amazing!! Love the book page background 🙂
I love the book page! What a smart idea that totally captures the spirit of Beauty and the Beast. Also, I have to say that your tutorial is fabulous. I use Photoshop for most of my editing but your tutorial makes Pic Monkey look crazy easy. It’s always good to have back ups.
Such a great project! Thank you for the tutorial. I am still learning how to use PicMonkey so this is great!
I love this move and i adore this idea! so unique and pretty! #bestandworst