I’m always looking for inspiration for new crafting and painting techniques, and the nail polish marbling trend is currently all over Pinterest, and I’ve been wanting to give it a try.
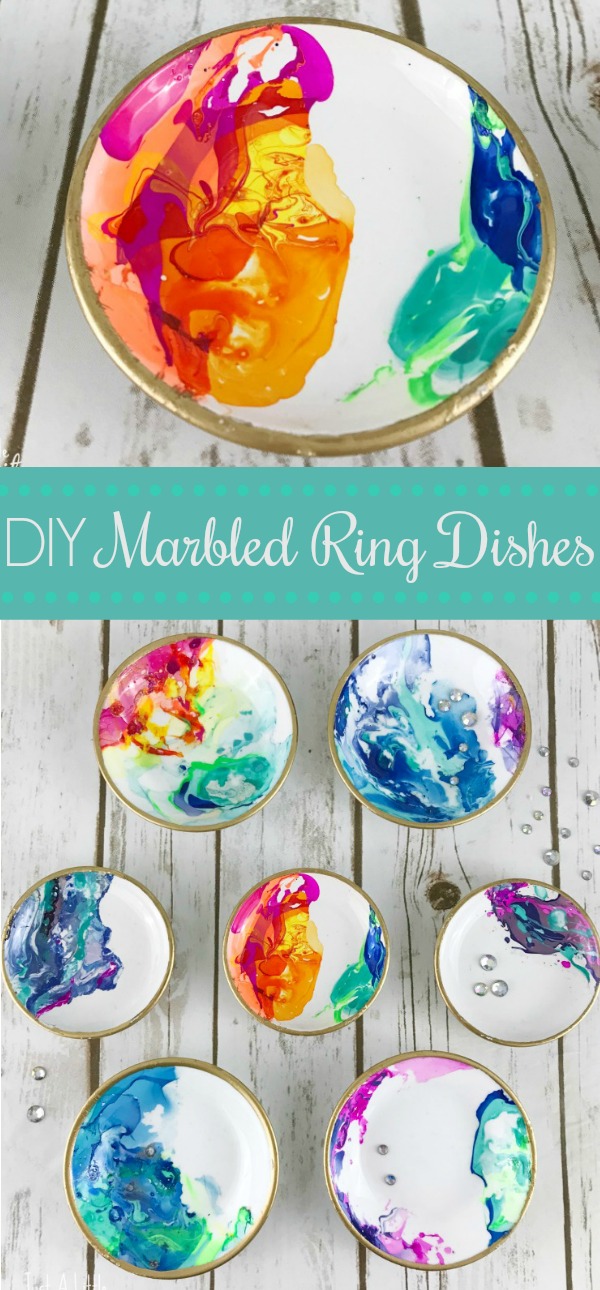
Welcome to the first 2018 monthly Pinterest Challenge Blog Hop, hosted by My Pinterventures. The purpose of this Pinterest Challenge is to motivate all the participants of this hop (and you too) to not just pin, but to make it happen! So this month, I chose to try to create these marbled ring dishes inspired from one of my most favorite and colorful bloggers Color Made Happy from this Pin.
She has a great tutorial video on her site as well, I definitely suggest checking it out.
DIY Marbled Ring Dishes
Supplies (with my affiliate links):
I didn’t want to spend a lot on a project that may or may not work well for me (ya’ll know how it is) so I sourced my nail polish & Acetone polish remover from Dollar Tree
Small white soy sauce dish like these
Uchida DecoColor Premium Chisel Tip Marker Gold <– I’m specific about this pen because it’s AWESOME as far as giving a vibrant and very metallic gold. It’s a great pen!
Warm water
Disposable container or bowl you don’t mind messing up forever

To begin, add warm water to your bowl, and drop your polish into the water.
This makes a skin on the top of the water that will float and dry very quickly. You can use a toothpick to blend or manipulate your polish if you want. The original pin that inspired this has specific designs in it that she made, but I couldn’t perfect the technique, so I went with a more organic design.
Because I knew I was using cool and warm colors separately, I used two different bowls.
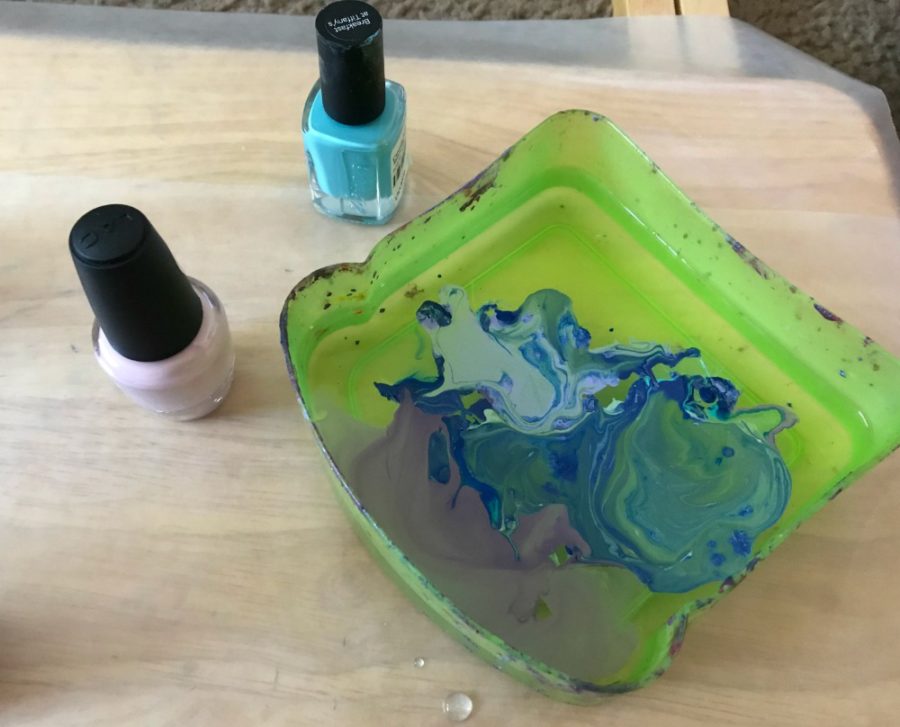
When the skin is formed on the top of the water, and you’re happy with the colors, you simply dip the bowl into the water making sure you get under the nail polish, and then you basically just scoop it up and onto the plate.

It will make really pretty designs, but it’ll be messy. I let my plates dry on wax paper overnight.
When the marbled plates have dried, you can clean off any spots you design you don’t like with a q-tip & 100% acetone polish remover.

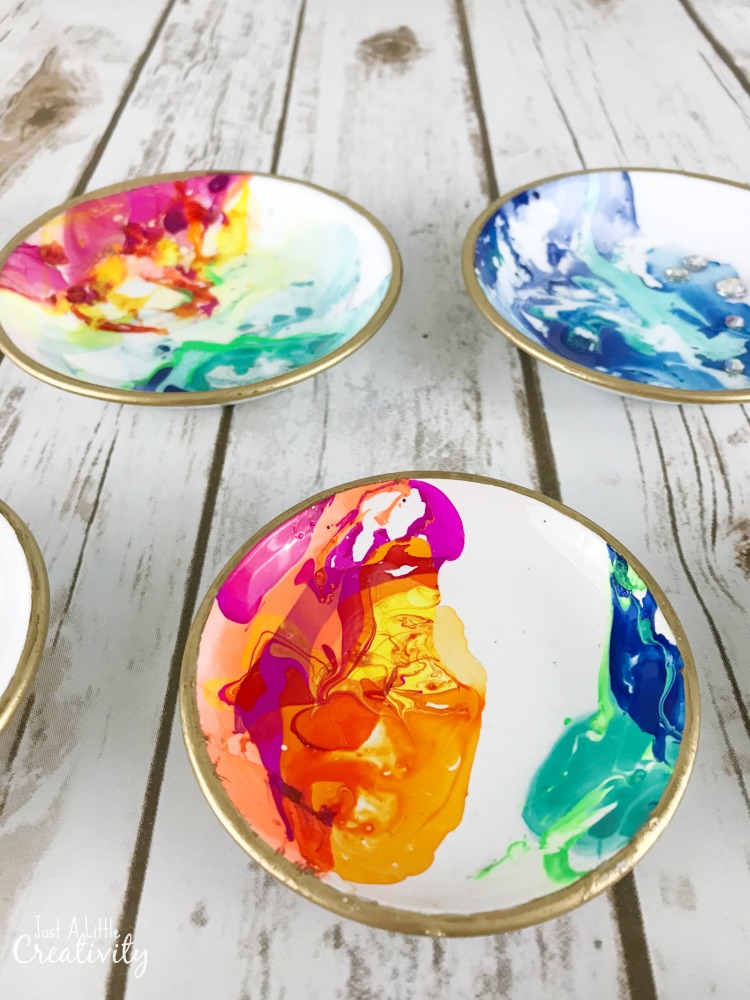
Next, because I really liked how the original Pin had a gold accent, I outlined the edge of mine in Bronze sharpie for a base metallic color.
When it was dry, I traced back over it with the gold DecoColor pen I mentioned earlier.

Once they were completely dry, I sealed the entire design using Rustoleum clear spray sealer.


I think it’s great that mine look different from the original inspiration plates, but that each of us created pieces that are beautiful!

Now let’s see what other things Pinterest inspired! Head over and visit the other hosts to see what they crafted, cooked, built, or tried!

Erlene – My Pinterventures • Shirley – Intelligent Domestications
Michelle – Our Crafty Mom • Molly – Just a Little Creativity
Marie – DIY Adulation • Jenny – Cookies Coffee and Crafts
Joanne – Our Unschooling Journey • Emily – Domestic Deadline
Roseann – This Autoimmune Life • Trisha – Blowing Away Out West
Sam – Raggedy Bits • Lynne – My Family Thyme • Beverly – Across the Blvd.
Debra – Shoppe No. 5 • Lauren – Mom Home Guide • Emily – Domestic Deadline
Heather – Glitter on a Dime • Gwen – Geez, Gwen! • Kristie – Teadoodles
Kelly – Under A Texas Sky • Candice – Fearlessly Creative Mammas
Chelc – Inside the Fox Den • Megan – C’mon Get Crafty

The colors are so bright and fun. That’s so cool that it’s nail polish.
What a great look! Thanks for the tip about the pen you used. That’s good to know. I love the combination of colors you used.
Such a creative art with nail polish. The mixing of color is so attractive. These marble rings are looking fantastic and so colorful.
I never thought of using nail polish! Now I know what to do with all my old sticky bottles! These turned out amazing!
These are really pretty and would make great one of a kind gifts!
Those are beautiful! I mustn’t let my boys see them though or they’ll be do disappointed in the color choices we had for our mugs! I can’t believe I din’t think to check the dollar store for colorful polish when we were picking up our mugs! I really enjoyed the nail polish marbling though and I’m sure we’ll try it again with other materials. Pinned.
These came out beautifully! Every year my sisters and I exchange small handmade gifts. This will likely be what I make! Thanks for sharing such a great idea!
Your dishes turned out so beautiful! They would make such lovely gifts too!
This is so pretty. They will look so nice as a plate to hold trinkets or as artwork on the wall.
Your ring dishes came our gorgeous! I love this technique and haven’t tried it yet, but it’s on my craft making list. I also have to pick up that gold pen and add it to my craft stash 🙂 Pinned.
Wow these are stunning! Think I would even buy one. Such a great idea and thanks for sharing with #bloggersbest x
Those are so cute! Nice job! Thanks for sharing at our link party!
So cute! I know our residents will love this idea.
This is fabulous!
I’m wondering how you disposed of the water/nail polish mix in the disposable bowl once you were done? (I imagine dumping it down the drain would be a REALLY bad idea!)
I will use this technique to decorate my wine bottles. Thank you for the tips.
Great idea and love the colors!