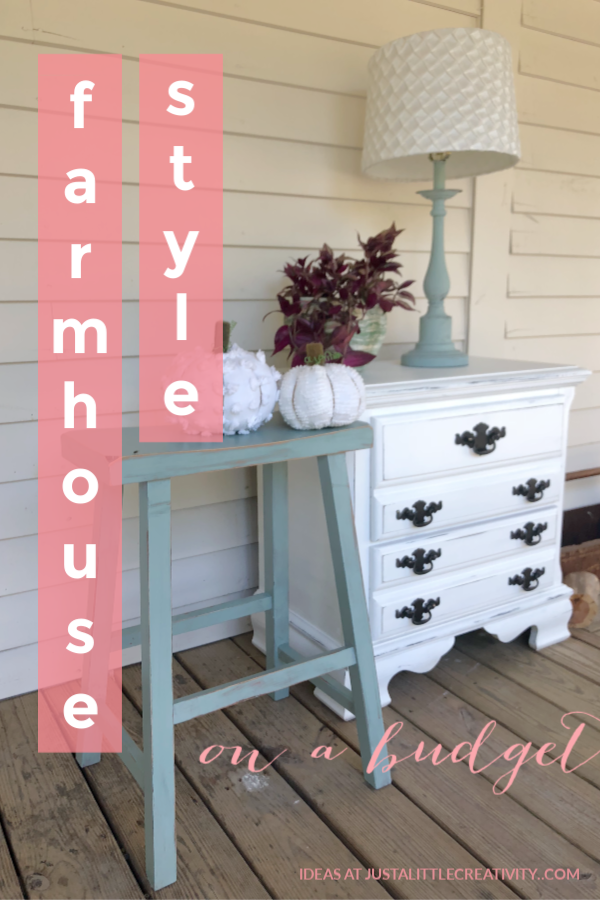
Farmhouse Style on a Budget
Tips, Ideas, and Inspiration to create a space for you to call home, all while saving money. This post contains affiliate links
One of the funnest, and maybe also most stressful things about moving into a new home, is decorating it. It’s combining the things you kept and want to use in from old space, and making them work in your new space. Since our move into an actual farmhouse in Tennessee from Florida (read all about that HERE), I’ve enjoyed finding and making over several pieces of furniture and decor to give it a farmhouse style look.
We downsized, but I still needed to find a few things that would fit specifically into our new home. However, moving is expensive, as is setting up a new home, so I’ve been working on a budget.
If you love the Fixer Upper farmhouse style, but you’re on a budget too, don’t worry!
I’m sharing some tips and inspiration that you can use to create your own professional look using thrifted & clearance finds.
Here are several before & after makeovers using items I’ve found at thrift stores, VarageSale, clearance sections, and yard sales.
Tip #1: Be Patient
Don’t spend your money on something you don’t love or that won’t quite work, and try not to overspend on something that will work but isn’t in your budget. If you can spare the time, and live without it for a bit, wait until you find just the right piece.
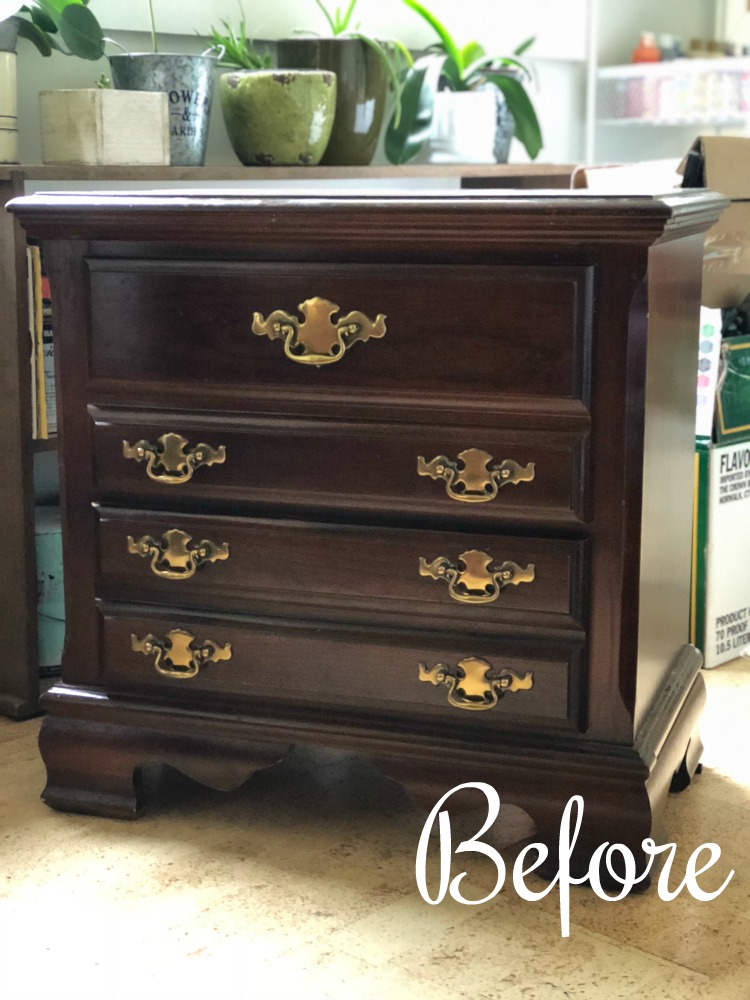
I wanted a small dresser or nightstand to put in my closet to store a lot of the things that came out of my old bathroom, such as band aids, lotions, nail polish, etc.
I found this one on for $25 and while it works, I spent a little more than I wanted to. Since then, I’ve seen similar pieces for a lot less at Goodwill.
I gave the outside two coats of Annie Sloan white chalk paint.

The sides of the drawers got my favorite, Annie Sloan duck egg blue, just for a fun little pop of color.
I wanted to replace the hardware, but decided to not spend any more on it and used flat black Krylon spray paint on the original pulls instead.
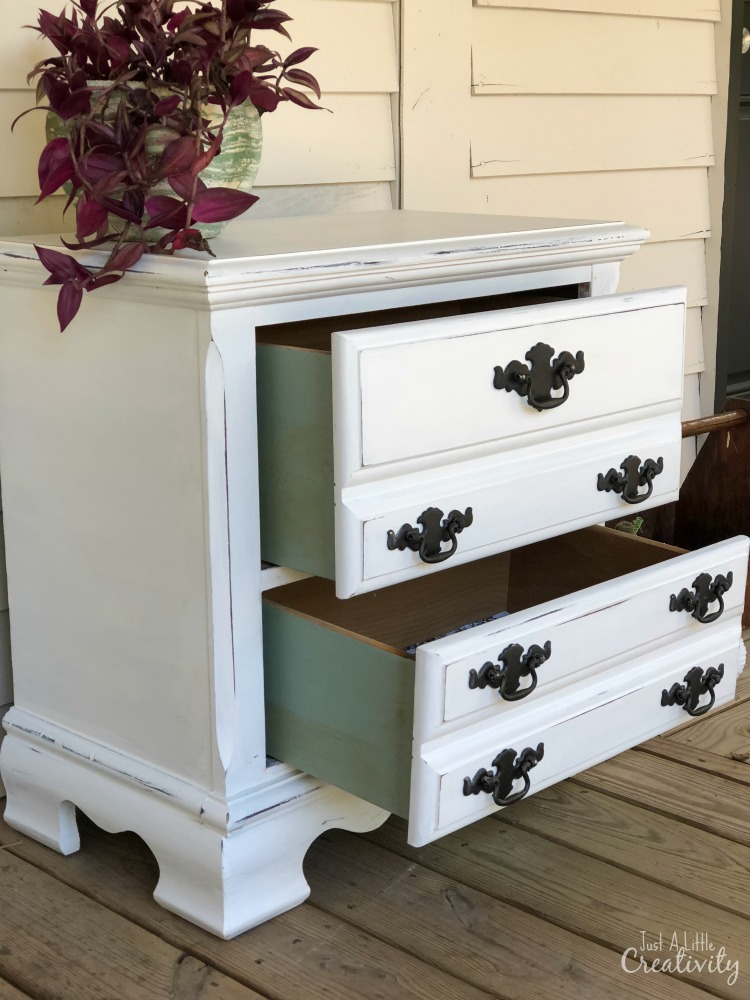
As a final touch, and to add to the farmhouse look, I lined the insides of the drawers with gray and white floral con-tact paper from Dollar Tree.

A coat of Minwax polycrylic, little distressing with sandpaper, and it became a cute little farmhouse dresser.
Tip #2 Pick a color palette and try to incorporate it throughout your home in some way
I said before, Duck Egg Blue chalk paint by Annie Sloan has always been my favorite. Because of that, I’ve used it through out the years on different pieces (just do a quick search on my page for duck egg blue, you’ll see what I mean) and it’s become one of the main accent colors in my home.
I found this small counter height stool for $5, and it fit perfectly under the end of my island that can be used for seating.
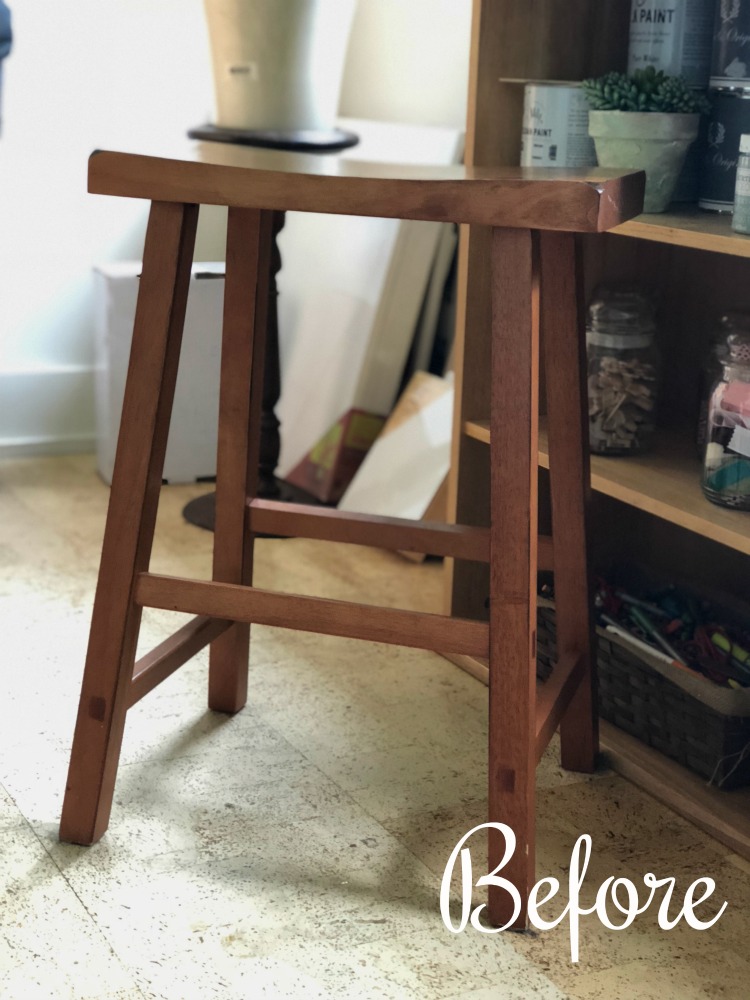
I painted it, and put several coats of the polycrylic sealer on it, because I knew it would get a lot of use.
Again, used a sanding block on the edges for the distressed farmhouse look, and it was ready.

Did you know that you can paint metal lamps with chalk paint too?
My $4.99 Goodwill lamp got a new shade that I had from my old house, and a blue makeover as well.
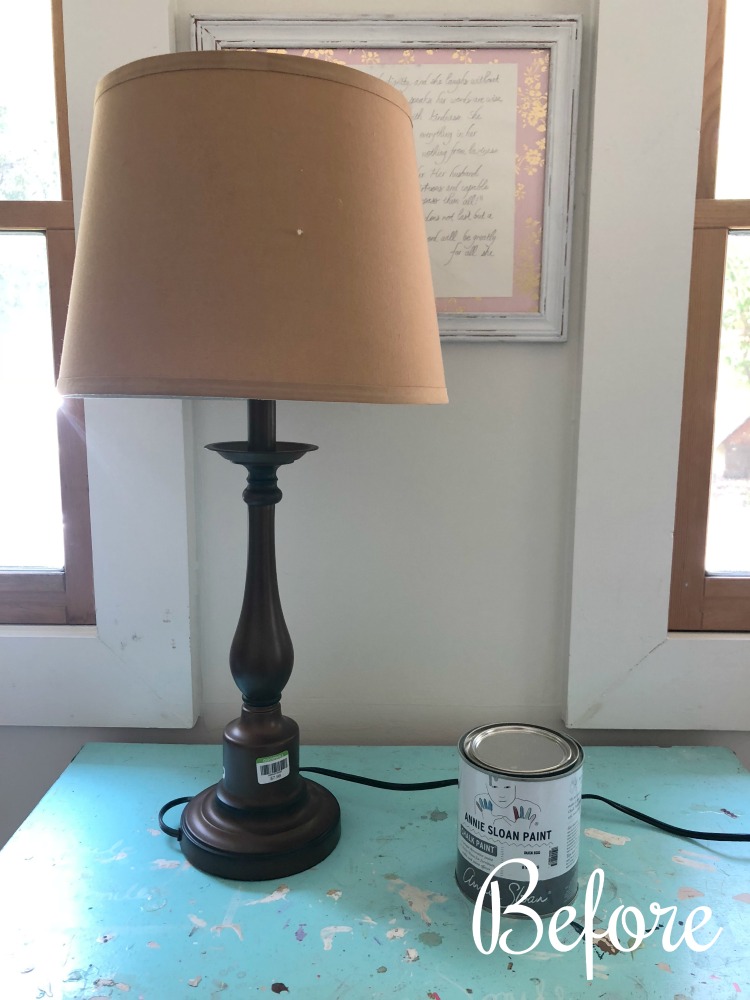

This isn’t the first lamp I’ve redone using chalk paint, you can find another beautiful vintage lamp before & after makeover I shared HERE.
Tip #3 Look for the shape, condition, & subject, not the color of an item
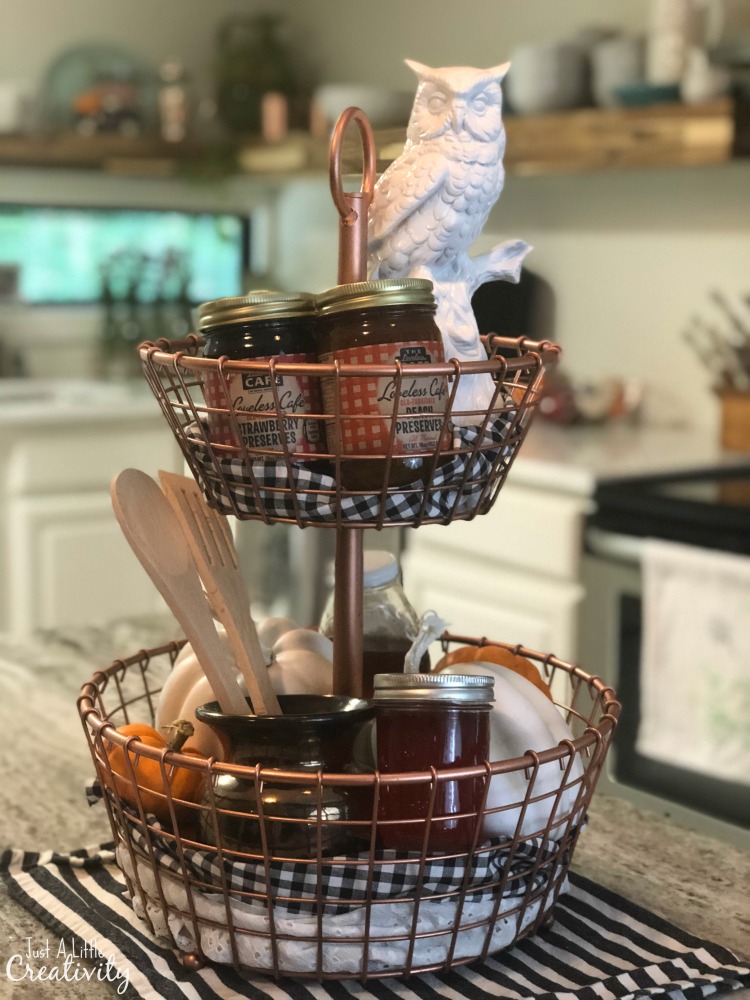
With Fall just around the corner, I wanted to be able to decorate my new island with some seasonal pieces.
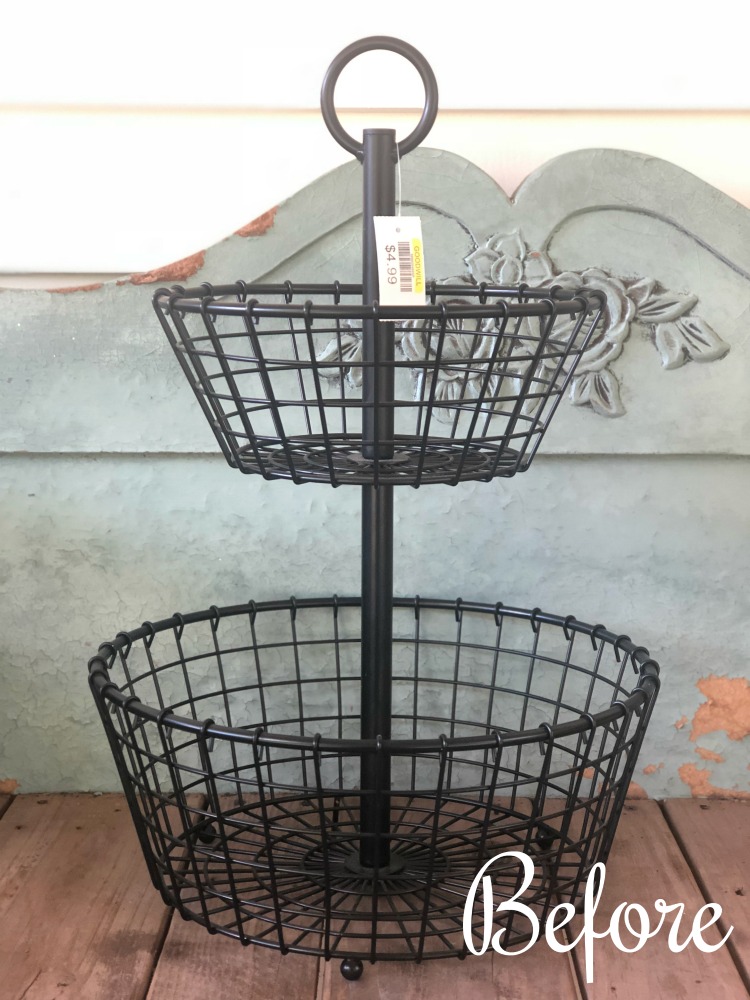
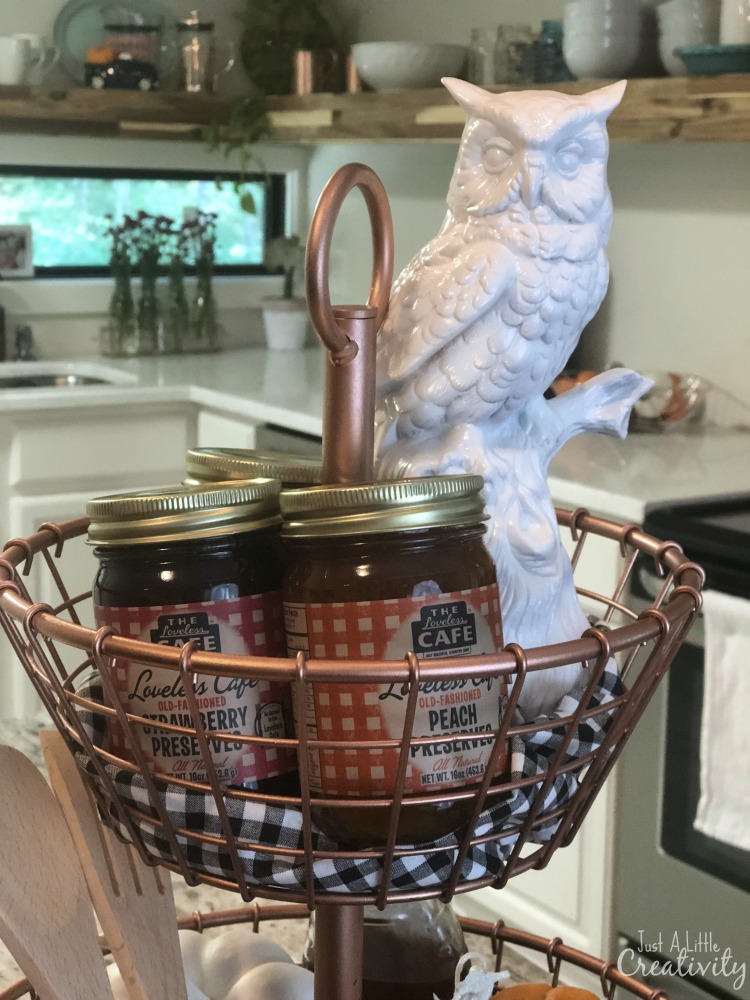
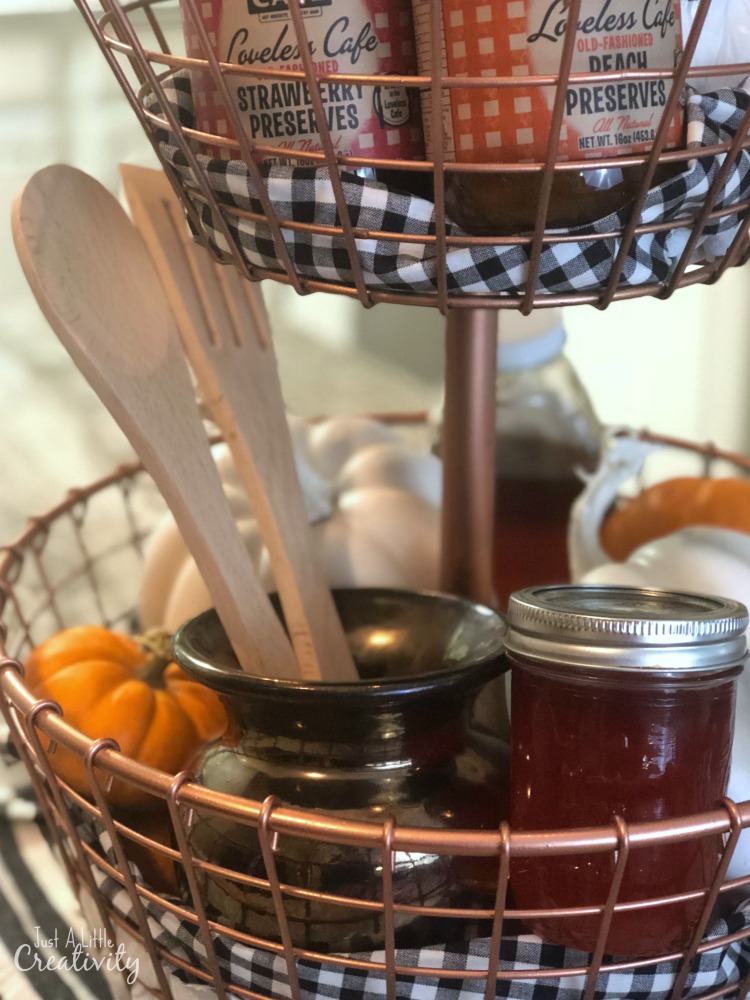
There’s a Goodwill just down the road from my son’s school where I pick him up, so I’ll often go about 30 minutes early just to browse a bit. One particular day I wasn’t really looking for anything specific, just something that may catch my eye, when I spotted this black metal tiered basket for $4.99.
I had just seen a similar tiered fruit basket online from Crate and Barrel in copper that I really liked.
When you see a piece that fits, but isn’t the right color, try to consider if it can be painted or not. Krylon has a beautiful metallic copper spray paint, and I knew it would be perfect for changing the look of this basket.
Because I wanted to be able to use it for holding fruits at some point, as well as seasonal decor, I also used Zinsser Bulls Eye Clear Shellac Spray to seal it.
I’d previously found a $1.99 ceramic owl from the 70’s, a $2.99 copper vase, and a buffalo check fabric remnant from JoAnn’s for $3.77.
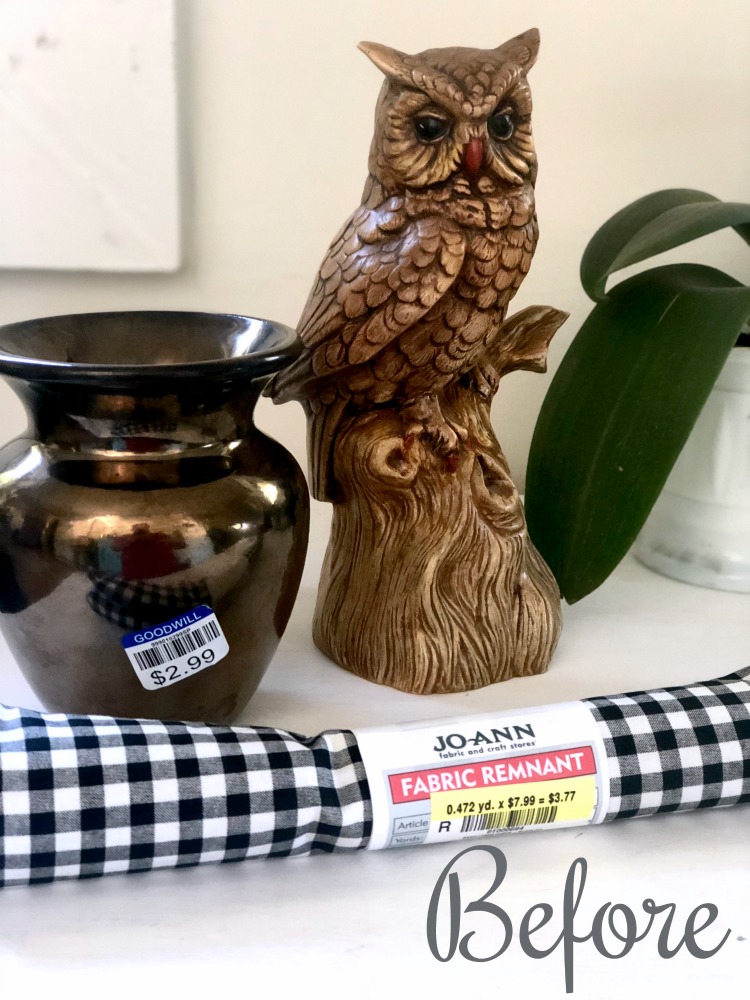
Using all these items combined with jars of local jelly, honey, and a few Target Dollar Spot pumpkins, I created a pretty seasonal centerpiece worthy of any farmhouse kitchen.
The size and shape of the ceramic owl were great, but the colors were all wrong. He received a few coats of glossy white spray paint, and became the focal point of my centerpiece.
Tip #4 Think Outside the Box
This is sometimes a little harder for me to do on the spur of the moment. I’m really good at thinking things through and creating a plan. But, every now and then I’ll see something and think “I bet I can use that for something” and then my brain freezes.
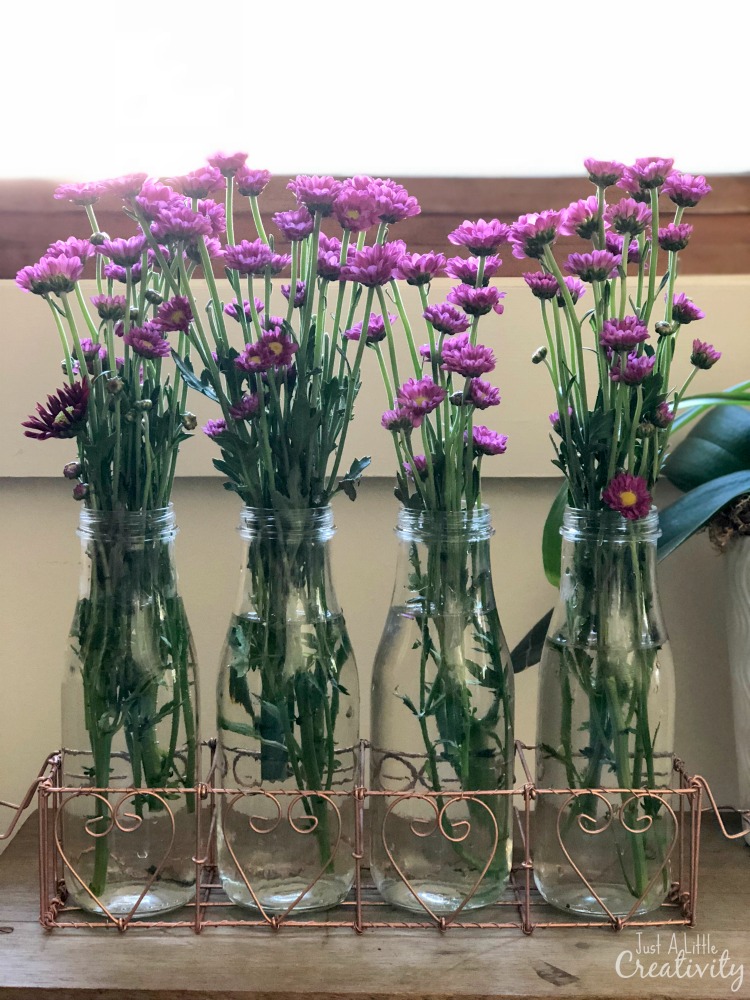
Such was the case with this cute little metal heart wire thing. I found it for 99¢ on a half off day, so it was only 50¢. I just knew I could use it but had no idea for what at the time. My daughter was with me and told me to just get it, so I did.
Later that afternoon, we were enjoying our Starbucks frappuccinos when the lightbulb moment happened. I bet that metal thing would hold these drink glasses as vases, and become a type of bud vase flower holder!
Joanna uses metal, glass jars, and bud vases all the time, so this little project is perfect for the look too.

Again, I used the copper spray paint, and also consumed too many frappuccinos.
But, they’re perfect.
The thing I like about this makeover is that it’s definitely outside the box, and it can hold greenery and flowers for any season of the year.
Tip #5 If you like it, can afford it, and it can be given a farmhouse makeover, Get it!
I used to be afraid to makeover or recreate something that might be vintage, even if if would suit my style better with an update.
I’m over that now. If I’m going for the farmhouse look (or any other decor style really), then I’m going to paint it or change it if it will work.
I found this mail sorter at a yard sale for $3. I researched it a little on Ebay and found that it actually sells pretty well just as it is. But, I don’t like the brown wood. I like the metal label, and the corner brackets, and it’s usefulness, but that’s it.
So, like everything else, I painted it to work for me.

Remember that when you’re updating your home, its YOUR space.
Not Pinterest, not Instagram, not your blog readers, your mother-in-law, or neighbors, but yours. Create your space to suit you and your family. Make it over until if feels just like home.

If the farmhouse style, with all its metal, wood, paint, and distressed looking pieces speaks to you, then go for it.
If you’re into a totally different type of design style, these same tips and bits of inspiration still apply.
You’re free to create the space you love, and with a little patience and creativity, you certainly don’t have to spend a fortune to make that happen. And remember, it’s the memories you make in a place that matter the most in the end anyway ♥

Love all your ideas Molly!!! Ya’ll have a Merry Christmas! Hugs from Alabama!
Thank you Debbie! I hope your Christmas was wonderful!