 This post contains affiliate links
Do you ever browse Pinterest to get an idea of what a paint looks like on a finished project before you commit to a color? Both of my hands are in the air for that. Pinterest is basically my first go-to for inspiration.
You can find me on Pinterest quite often, so make sure to say hey if you do!
If you’ve landed here because you’re also wanting inspiration on a thrifted piece, in this case a desk, using General Finishes products, welcome!
I’m hoping this project will inspire you. Keep on reading because I’ll share a few pros and cons that I found with each product. I’ll give you a spoiler ahead of time though – I love my finished results…
Furniture Upcycle Challenge
Although we were just talking about Pinterest, this inspiration for this project actually got started on Instagram.
There, I partnered with a small but talented team of other furniture artists & upcyclers for the Furniture Upcycle Challenge.
These are the before images, check out each blogger for the afters – Clockwise from top left
Tania from Created by a Gemini shows us how illusions can make your furniture upcycle look expensive and have features it never had.
Angela from Simply Beautiful by Angela takes a piece of furniture that isn’t made from real wood and makes it appear as though it is.
Heather from Heather Paige shows off her creativity with this French Provencial dresser makeover. Upcycling an outdated unused piece of furniture into a nightstand.

The Desk Before
So, the day I went looking for a piece to makeover for the collaboration was actually a rare one because 1) My husband was home and not traveling for work and 2) He went thrifting with me.
Cool, yes, but ya’ll don’t understand how dangerous to our bank account that actually is though.
Because, while I’ll sit and stare at a piece, walk away from it, come back and think some more, he’s more of a “You like it, you buy it, what’s there even to think about?” kind of guy.
I’m not kidding, we’d have gone home with like, 4 dressers and desks that day if it were up to him. Ha!
Anyway, back on track.
This desk is solid wood by Thomasville. It’s a serious quality piece. I’m not even sure if it’s vintage or if it was just outdated. At the thrift store among all the other pieces, it looked like your brown, run of the mill desk.
Ah, but like every good furniture makeover-er (?) knows, I could see that it’s got good bones and a lot more life to give.


Desk Makeover Using General Finishes
We sell General Finishes where I work, Farm Fresh Vintage, so I’m a bit familiar with their products.
I like to use them as often as I can in order to point our customers in the right direction. Similar to sharing here on the blog, I like to be able to give pros and cons to the products, and to know what to expect as a result.
If you follow me on Instagram, you probably saw my story where I gave a sneak peek at what direction I was going on the desk.

To update the desk top, I gave it a light sanding & two coats of General Finishes Java Gel Stain.
I’ve been using this stain for years, and it’s hands down my favorite. Here’s a set of end tables I used it on, and also a pair of dressers.

Java Gel Stain Pros: It wipes or brushes on easy, and it’s a beautiful, dark, rich color. An oil based topcoat can go on about 24 hours later.
Java Gel Stain Cons: It’s a longish process. I like to move through my projects quickly, but it’s recommended that it cures 24 hours between coats. And, because it’s oil based, you need to check with your local garbage collection company about the proper way to dispose of any rags or brushes. If you topcoat is with a water based topcoat, you have to wait about 3 days to do that.
I liked the original drawer pulls and will try to use the originals as often as I can in a project.

To paint, I removed all the drawers and hardware. She got two coats of General Finishes Queenstown Gray Milk Paint.
Queenstown Gray Milk Paint Pros: Well, I could go on and on about this paint, but a few of my favorite things are the ease of use (a lot like chalk paint, it stick to everything). I love the color selection, and it doesn’t need a topcoat about 99% of the time because of it’s bonding properties. It’s also self leveling, which means brush strokes are almost non-existent.

Queenstown Gray Milk Paint Cons: Not too many actually. I guess maybe if I were being picky, a few of the colors will take two or more coats for full coverage (I’m looking at you White). If you want to distress it, you need to do it within the first two hours for easy distressing. Otherwise the bonding is so tough you may need a palm sander.
Ok, and the final product I used was General Finishes Gel Topcoat in Satin on the stained top (not the painted parts). You simply rub on the topcoat, and wipe the excess back off. I gave it the recommenced 3 coats.

General Finishes Gel Topcoat Pros: Because it’s oil based, going on top of another oil based product, once it cures it’s so durable.
General Finishes Gel Topcoat Cons: Honestly, this wasn’t the easiest product to use. It has a 24 hour cure time between coats, and it’s recommended to use 3 coats. Three days. Ugh. I also didn’t love the final results. It’s got beautiful coverage, but I feel like you can just see too many strokes from the application. In my opinion, a brush on topcoat would’ve looked better in the end. And again, you have to check your local laws for disposal of the brushes or rags you use. And it takes 30 days to fully cure. Ultimately, just too much hassle for my impatience.
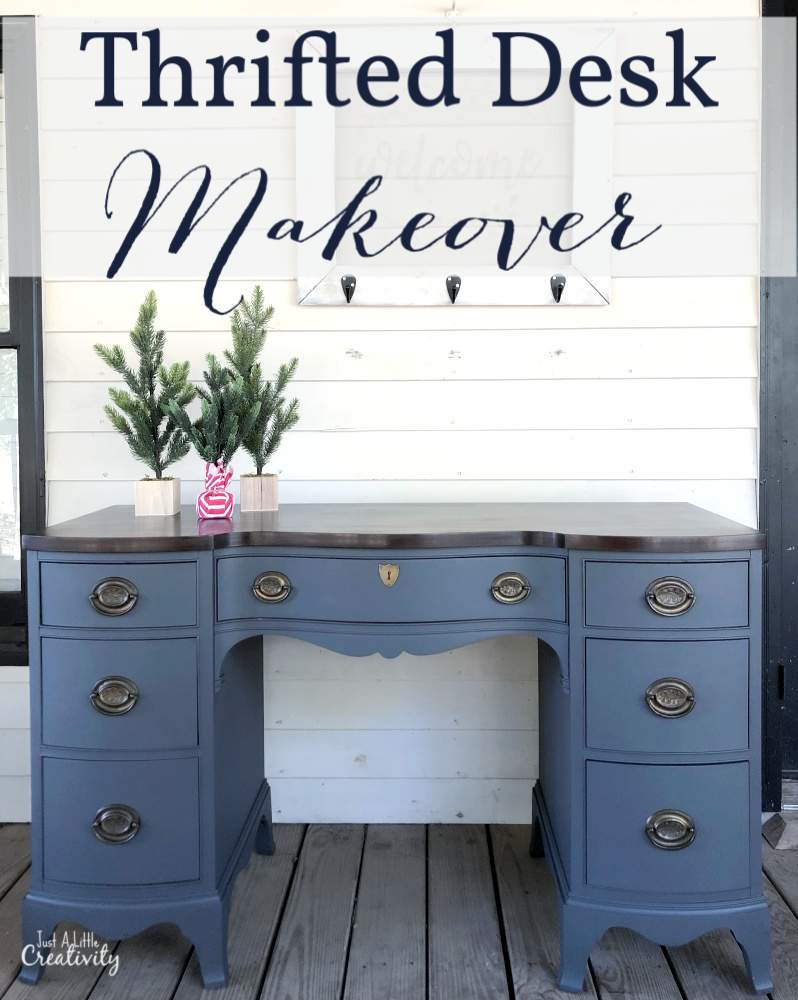
Desk Makeover Using General Finishes – The Results
Ya’ll.
This desk is gorgeous! Although I didn’t love the looooong process, I do think in the end it was worth it.


This is so pretty Molly I absolutely love how it turned out!!
Is it just the lighting when you took the pictures or does it have a blue undertone? Super sharp but curious about the color?
Hey! This gray does have a really pretty blue undertone 🙂